在 Golang 项目中使用 Spring Cloud Config Server 管理配置
引言
最近用 Go 写后端写得很开心, 写篇比较实用的博客总结下如何通过 Spring Cloud Config Server 管理 Go 程序中的配置. 实现并不复杂, 因此也可以很轻易地推广到其他语言的程序中.
先来说说为什么要做集中配置管理. 在单体应用时代配置管理并不是什么大问题, 一般配置文件就和源码一起放在代码仓库中, 要查看或者修改直接到 conf 目录里找就完事儿了. 但到了微服务时代, 服务的数量比过去多了几十倍, 再到茫茫多的代码仓库里找配置可就没这么简单了. 因此我们需要一个能够统一查看修改配置, 能够对配置进行版本控制的地方, 这就是配置中心了.
在 Google 上搜索 “配置中心” 能找到不少不错的开源软件, 但大部分都比较重, 并且需要引入特定的客户端. 这对没到那么大规模的中小团队来说未免太过折腾. 因此反而像 Spring Cloud Config Server 这样的轻量级配置中心比较适合, 几分钟就能跑起来, 而且和配置本身相关的功能也足够丰富了.
因此我们的架构就像下面这样:
- Git: 储存具体的配置文件, 并且负责配置版本管理
- Spring Cloud Config Server: 提供配置的查询接口
- Go App: 从配置中心载入配置并使用
OK, 下面正式开干吧.
简单的搜索服务
作为演示我们用 Go 写一个很简单的搜索服务. 只要访问 GET /search?q=<keyword> 服务就会把搜索引擎查到的结果展示出来. 用 Go 实现只要一个文件哦 ~
main.go
package main

import ...

func main() {
	http.HandleFunc("/search", func(w http.ResponseWriter, req *http.Request) {
		q := req.URL.Query().Get("q")
        fmt.Fprintf(w, `<iframe width="100%%" height="98%%" scrolling="auto" frameborder="0" src="https://cn.bing.com/search?q=%v">`, q)
	})
	log.Fatal(http.ListenAndServe(":8081", nil))
}
接着把服务跑起来: go run main.go
在浏览器中访问 http://localhost:8081/search?q=golang
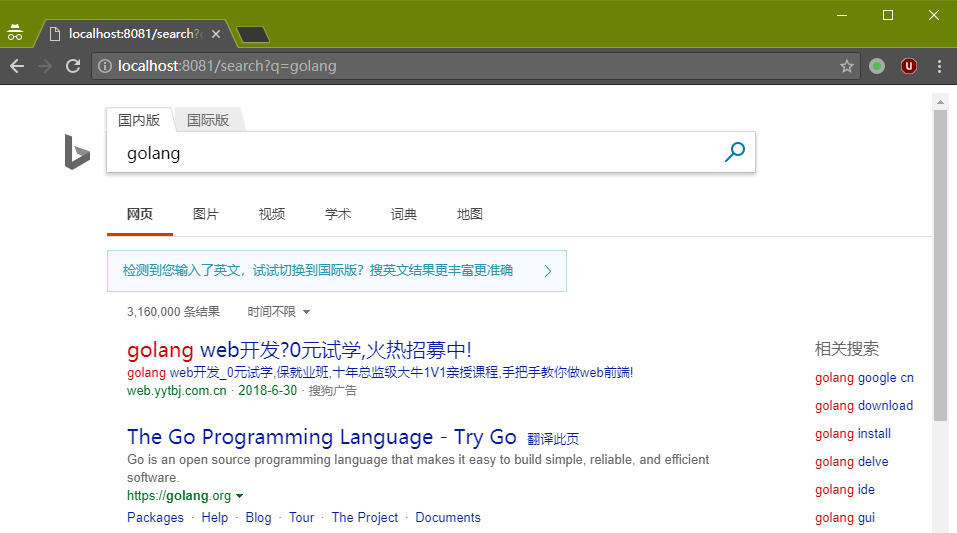
很简单是不是? 但这里的问题在于我们把 https://cn.bing.com 写死在了代码中, 如果要切换搜索引擎就得重新编译程序, 真的是费时费力. 这时候我们就需要将配置解耦到配置文件中了.
配置文件
我们先在本地建一个配置文件 go-app.yml
app:
  search_url: https://cn.bing.com/search?q=%v
然后通过 viper 这个比较流行的配置库加载这个配置
conf/conf.go
package conf

import ...

func init() {
	viper.SetConfigName("go-app")
	viper.AddConfigPath(os.ExpandEnv(`$GOPATH\src\github.com\GotaX\config-server-demo`))
	viper.SetConfigType("yaml")
	if err := viper.ReadInConfig(); err != nil {
		log.Fatal("Fail to load config", err)
	}
}
现在我们就把搜索引擎的地址解耦到配置文件中去了
main.go
package main

import ...

func main() {
	http.HandleFunc("/search", func(w http.ResponseWriter, req *http.Request) {
		q := req.URL.Query().Get("q")
        src := fmt.Sprintf(viper.GetString("app.search_url"), q)
		fmt.Fprintf(w, `<iframe width="100%%" height="98%%" scrolling="auto" frameborder="0" src="%v">`, src)
	})
	log.Fatal(http.ListenAndServe(":8081", nil))
}
转移配置到云端
接下来我们将配置文件从本地转移到 Git 中, 处于方便我就直接放在当前仓库的 config 分支中了.
地址为: https://github.com/GotaX/config-server-demo/tree/config
启动配置中心
配置文件上传完毕, 我们再新开一个 config-server 空分支搭建配置中心.
首先到 https://start.spring.io/ 页面新建一个 Java + Gradle 的 Spring Boot 工程, 依赖项选 Config Server
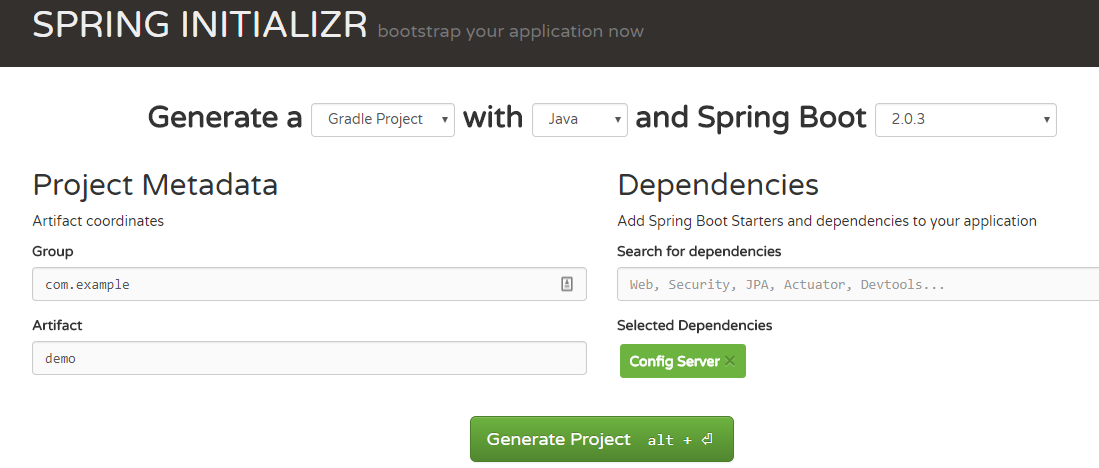
点击 “Generate Project” 将下载压缩包, 并解压.
修改 Application.java
package com.example.demo;

import org.springframework.boot.SpringApplication;
import org.springframework.boot.autoconfigure.SpringBootApplication;
import org.springframework.cloud.config.server.EnableConfigServer;

@EnableConfigServer  // 添加这行
@SpringBootApplication
public class DemoApplication {
  public static void main(String[] args) {
    SpringApplication.run(DemoApplication.class, args);
  }
}
修改 application.yml, 填入我们存放配置文件的仓库地址
spring.cloud.config.server.git.uri: https://github.com/GotaX/config-server-demo.git
在工程根目录启动 config server
gradle bootrun
访问 http://localhost:8080/config/go-app-default.yml 查看配置
app:
  search_url: https://cn.bing.com/search?q=%v
这样我们的配置中心就启动完毕了
在 Go 应用中读取配置
最后就是在应用中使用 Spring Cloud Config Server 中的配置了. 如果是基于 Spring Boot 的应用可以直接使用 spring-cloud-config-client 加载配置. 在 Go 中就需要稍微写点代码了, 不过并不多.
我们先在 config.go 中添加一个 loadRemote() 函数, 用来从配置中心读取配置
conf/conf.go
// ...
const (
	kAppName       = "APP_NAME"
	kConfigServer  = "CONFIG_SERVER"
	kConfigLabel   = "CONFIG_LABEL"
	kConfigProfile = "CONFIG_PROFILE"
	kConfigType    = "CONFIG_TYPE"
)

func loadRemoteConfig() (err error) {
    // 组装配置文件地址: http://localhost:8080/config/go-app-default.yaml
	confAddr := fmt.Sprintf("%v/%v/%v-%v.yml",
		viper.Get(kConfigServer), viper.Get(kConfigLabel),
		viper.Get(kAppName), viper.Get(kConfigProfile))
	resp, err := http.Get(confAddr)
	if err != nil {
		return
	}
	defer resp.Body.Close()

    // 设置配置文件格式: yaml
	viper.SetConfigType(viper.GetString(kConfigType))
    // 载入配置文件
	if err = viper.ReadConfig(resp.Body); err != nil {
		return
	}
	log.Println("Load config from: ", confAddr)
	return
}
当然, 我们需要知道配置中心的入口, 因此还需要一个 initDefault() 函数来初始化这些配置
conf/conf.go
func initDefault() {
	viper.SetDefault(kAppName, "go-app")
	viper.SetDefault(kConfigServer, "http://localhost:8080")
	viper.SetDefault(kConfigLabel, "config")
	viper.SetDefault(kConfigProfile, "default")
	viper.SetDefault(kConfigType, "yaml")
}
现在我们的 init() 函数变成了这样
conf/conf.go
func init() {
	viper.AutomaticEnv()
	initDefault()

	if err := loadRemoteConfig(); err != nil {
		log.Fatal("Fail to load config", err)
	}
}
其中的 viper.AutomaticEnv() 可以让我们通过环境变量修改任意配置, 因此 initDefault() 中的配置也不是写死在代码中的了. 其中比较常见的用法是通过 CONFIG_PROFILE=prod 环境变量来切换 profile
最后我们希望 viper 仅在 conf 包中出现, 而对外隐藏我们加载配置的具体实现. 因此我们将配置读到结构体中再对外提供.
conf/conf.go
var App AppConfig

type AppConfig struct {
	SearchUrl string `mapstructure:"search_url"`
}

func init() {
	// ...
	if err := sub("app", &App); err != nil {
		log.Fatal("Fail to parse config", err)
	}
}

func sub(key string, value interface{}) error {
	sub := viper.Sub(key)
	sub.AutomaticEnv()
	sub.SetEnvPrefix(key)
	return sub.Unmarshal(value)
}
这时我们就可以从 main.go 中去掉 viper.Get() 调用了
main.go
import ...

func main() {
	http.HandleFunc("/search", func(w http.ResponseWriter, req *http.Request) {
		q := req.URL.Query().Get("q")
		src := fmt.Sprintf(conf.App.SearchUrl, q)
		fmt.Fprintf(w, `<iframe width="100%%" height="98%%" scrolling="auto" frameborder="0" src="%v">`, src)
	})
	log.Fatal(http.ListenAndServe(":8081", nil))
}
总结
我们通过 Git + Spring Could Config Server + Viper + 少量 Go 代码, 实现了基于配置中心的配置管理及使用
我们甚至可以在 Go 中使用类似于 Spring Boot 的 Profile 管理, 对比下:
- http://localhost:8080/config/go-app-default.yml
- http://localhost:8080/config/go-app-prod.yml
完整的代码可以参考 https://github.com/GotaX/config-server-demo 下的 3 个分支:
- config: 配置文件
- config-server: 配置中心
- app: Go 应用
当然, 目前这种使用方式还比较简陋, 还有很多可以改进的地方, 比如:
- 结合 Spring Cloud Bus 实现配置的实时推送
- 结合 Spring Cloud Eureka 实现配置服务器的高可用
有机会的话下次再写, 或者也可以直接参考 Spring Cloud Config Server 的官方文档
如果你有疑问或者更好的想法, 实践, 欢迎留言讨论